
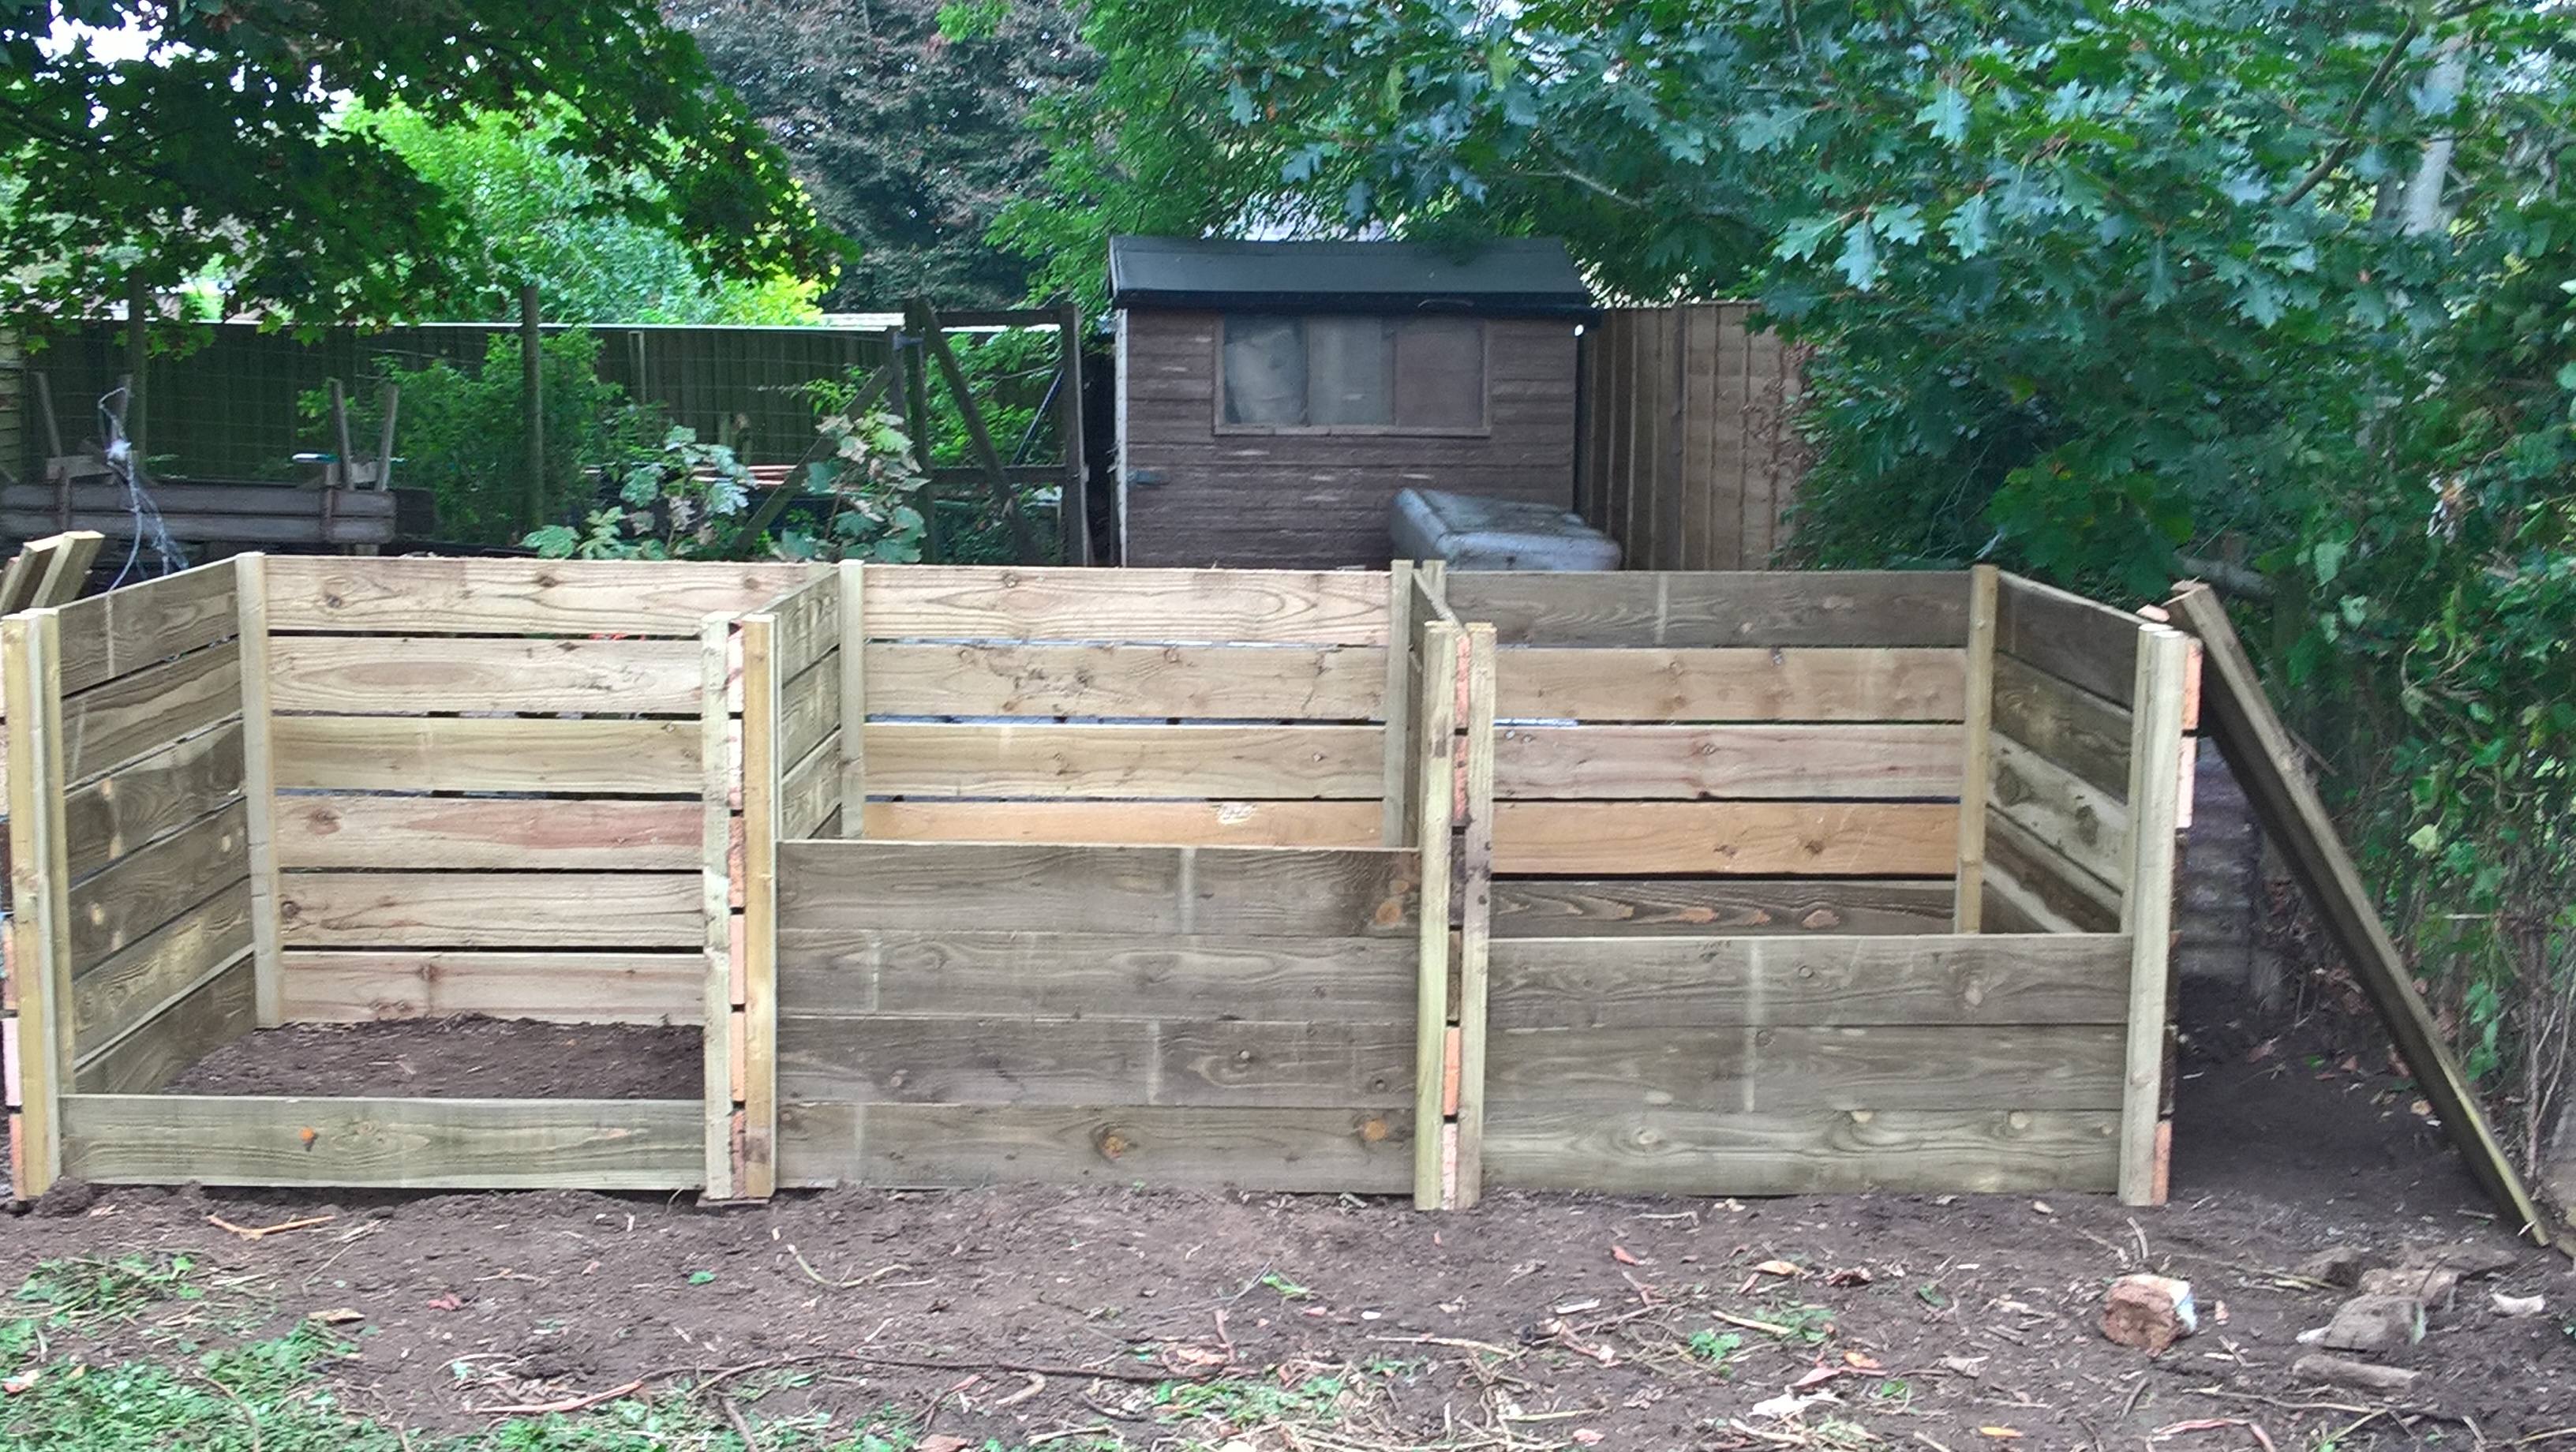
The above set-up is all you will ever need by way of composting.
Three bins is the nirvana of perfect compost-making: you have one bay you’re filling (usually the one on the left), then the middle one is rotting down over six months or so, and the one on the end is rotted and ready to use.
Once you’ve used the compost on the right-hand side, you simply turn the compost from the middle bin into the right-hand bin, then empty your newest compost into the middle bin. Cover and leave to rot, and start a new heap in the left-hand bin. As you move it across you mix it all up, accelerating the rotting process and generally improving your compost making.
Each bay measures about 1.2m square and tall – it holds around a cubic metre of compost. I find this is about as much as an average veg garden (or allotment) can cope with, both because it takes up a fairly large chunk of garden (1.2m x about 4m altogether), and it’s as much as I can do to keep up with filling it even with my fairly hefty array of material including garden waste, kitchen waste and the, ahem, rear-end products from horses, sheep and chickens.
We gardeners are nothing if not multi-taskers, so I made one of my triple-bay compost bins for a client last week. This is the third set I’ve done now; if you don’t fancy the full three bins right away, just scale it down and make separate 1.2m x 1.2m boxes instead. Then you can build your compost empire at the pace and volume you wish to have it.
It takes about two days to do – a comfortable weekend’s work.
Day 1: Make your middle bits
First, cut your boards. I used 15cm planks (they’re about 2.2cm wide).
For the entire three-bay set of compost bins you will need:
12 x 1.2m boards for the two central dividers
6 x 1.2m boards and 6 x 1.22m boards for the two ends (all will become clear)
and 14 x 1m lengths of 5cm x 5cm uprights
6 x 2.5m boards plus 6 x 1.5m boards for the back
18 x 1.2m boards to slot into the front
You’ll also need a lot of 50cm (2″) nails, plus a few 75cm (3″) nails too; and a drill to pre-drill the holes and prevent the wood from splitting.
Make the two central dividers.
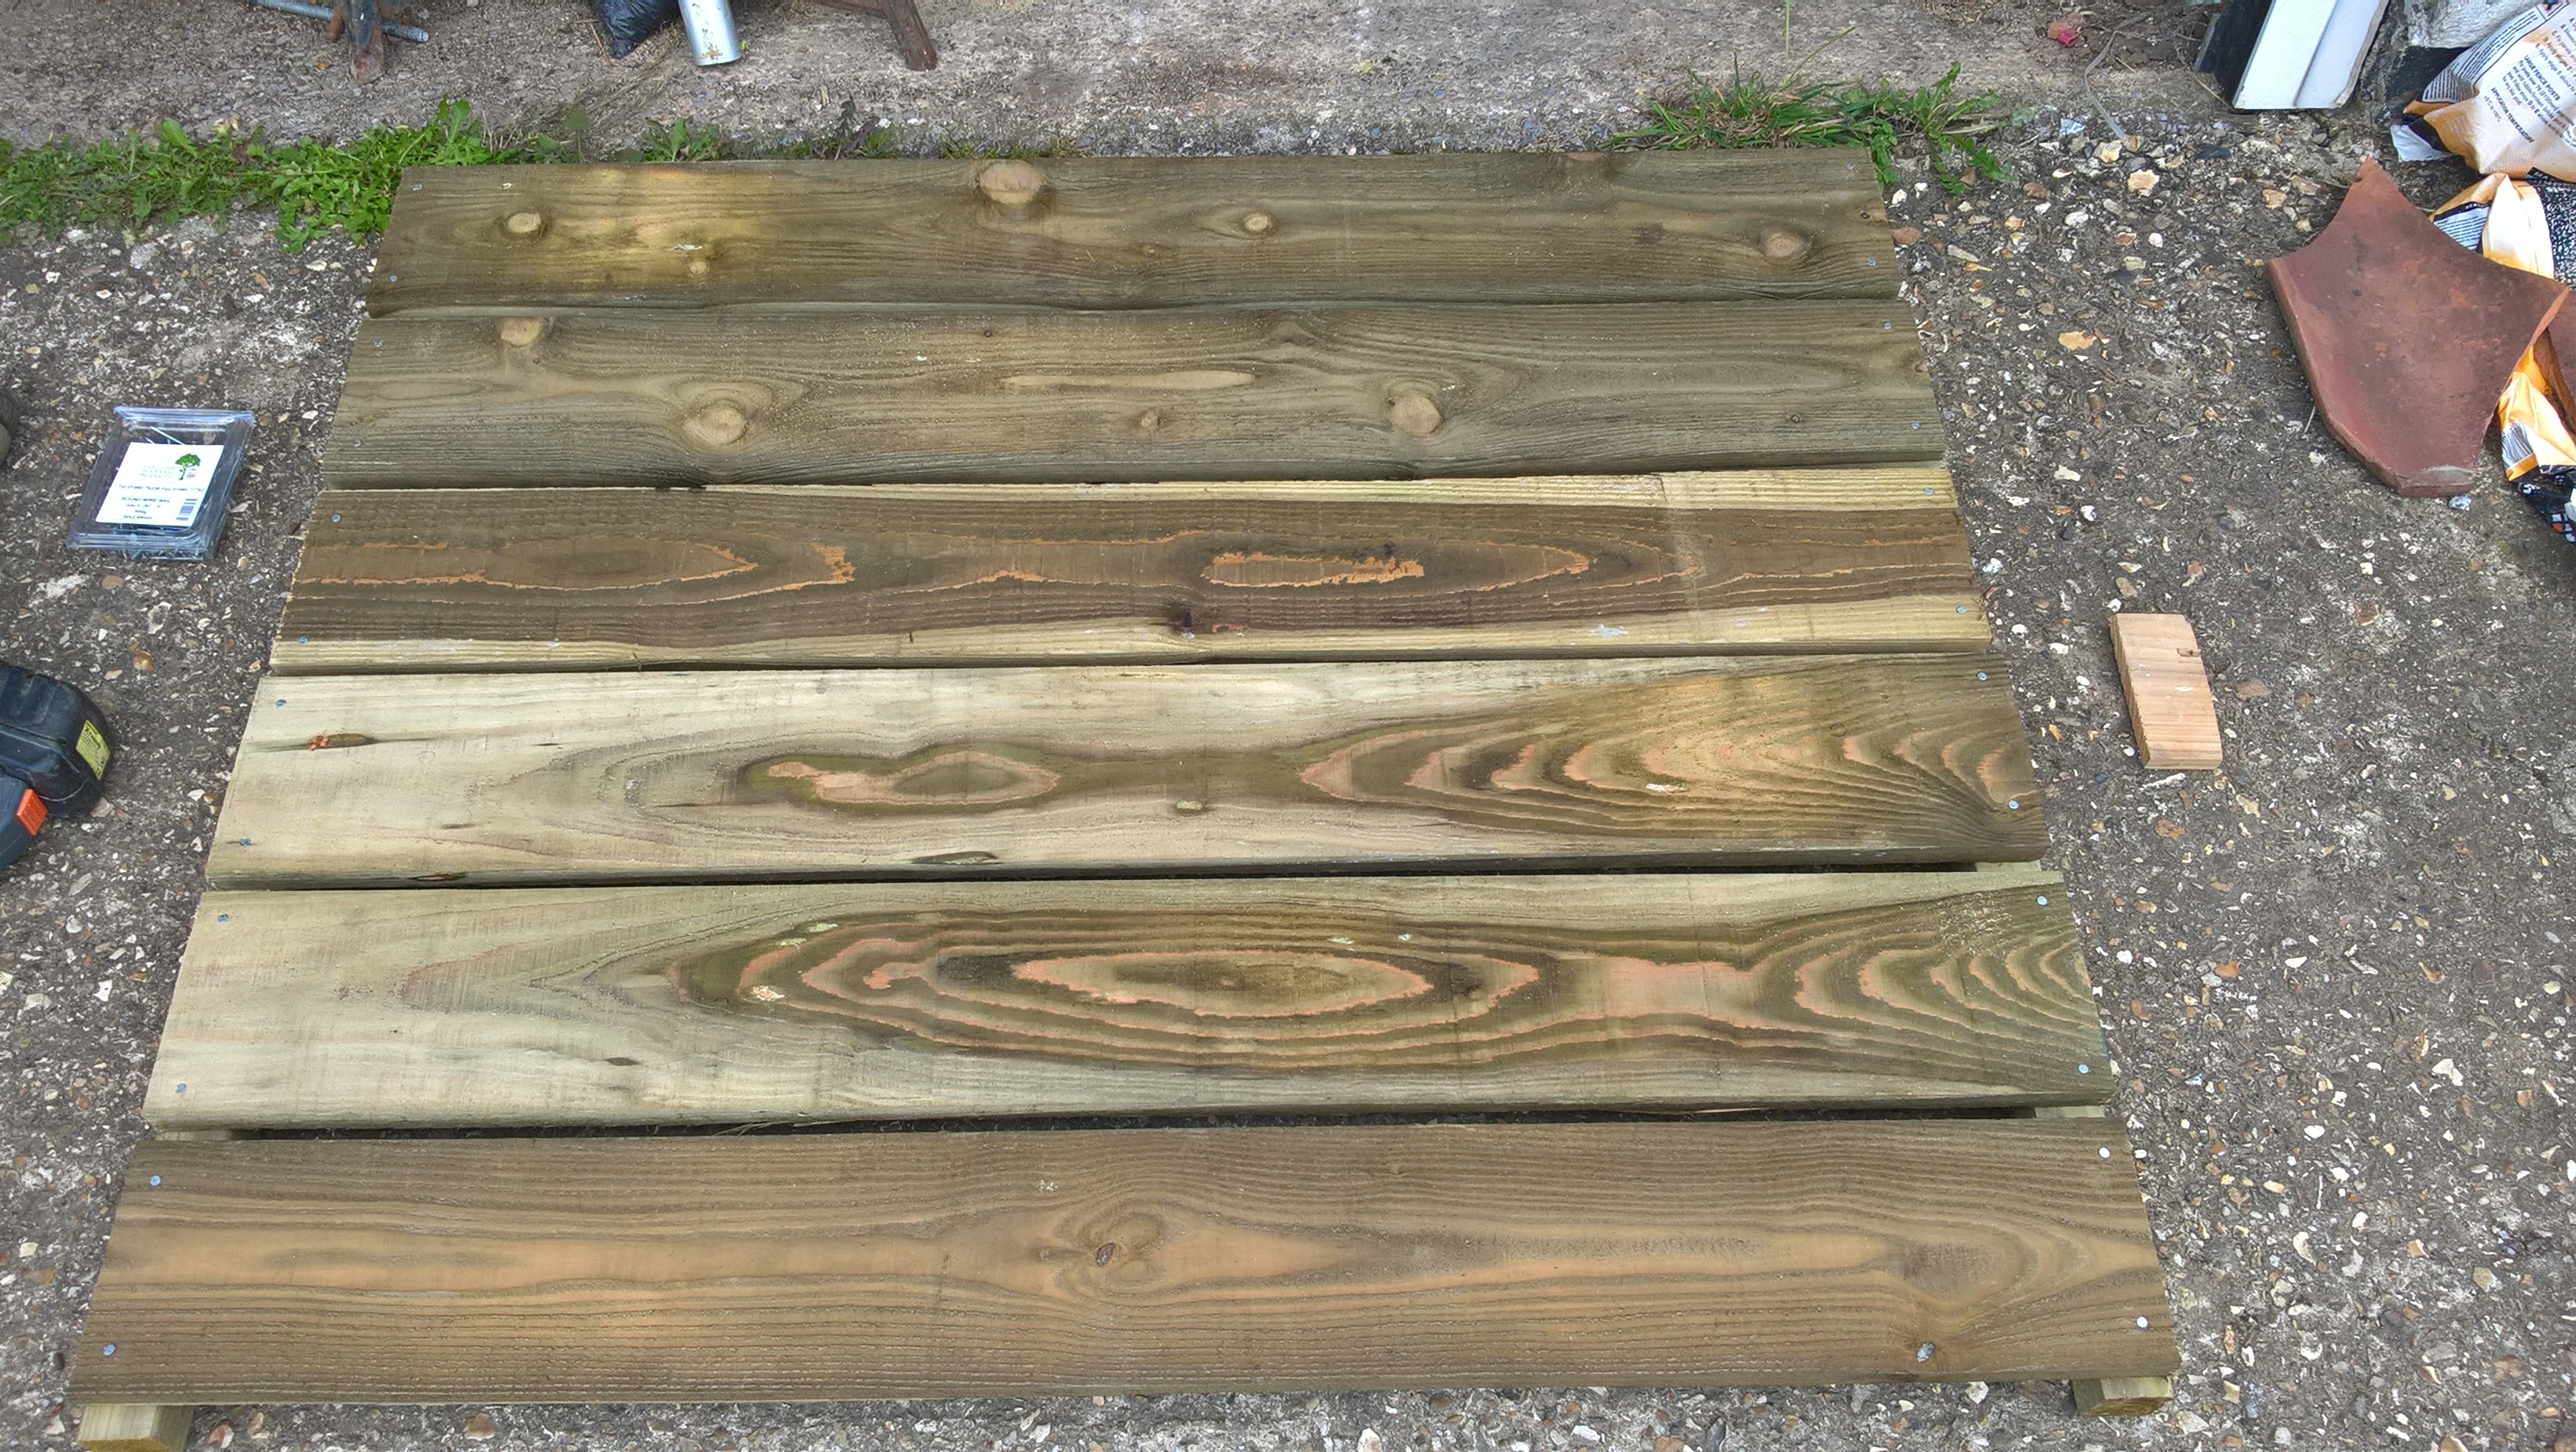
Boards nailed onto single uprights for the central dividers
Space two of the uprights 1.2m apart on the ground, then nail six of the boards to them, using a spacer to leave a gap between each board. This spacer can be any width you want as long as you use the same spacer throughout: I find a scrap bit of plank is ideal.

An offcut of board (approx 2cm) works well as a spacer
Next, nail another upright onto the other side of the planks at each end (you’ll need to use the 75cm nails for this bit). And finally, nail a second upright behind the first on each side at the front of your divide: the gap should be about 3cm (this is to slot the removable planks into).
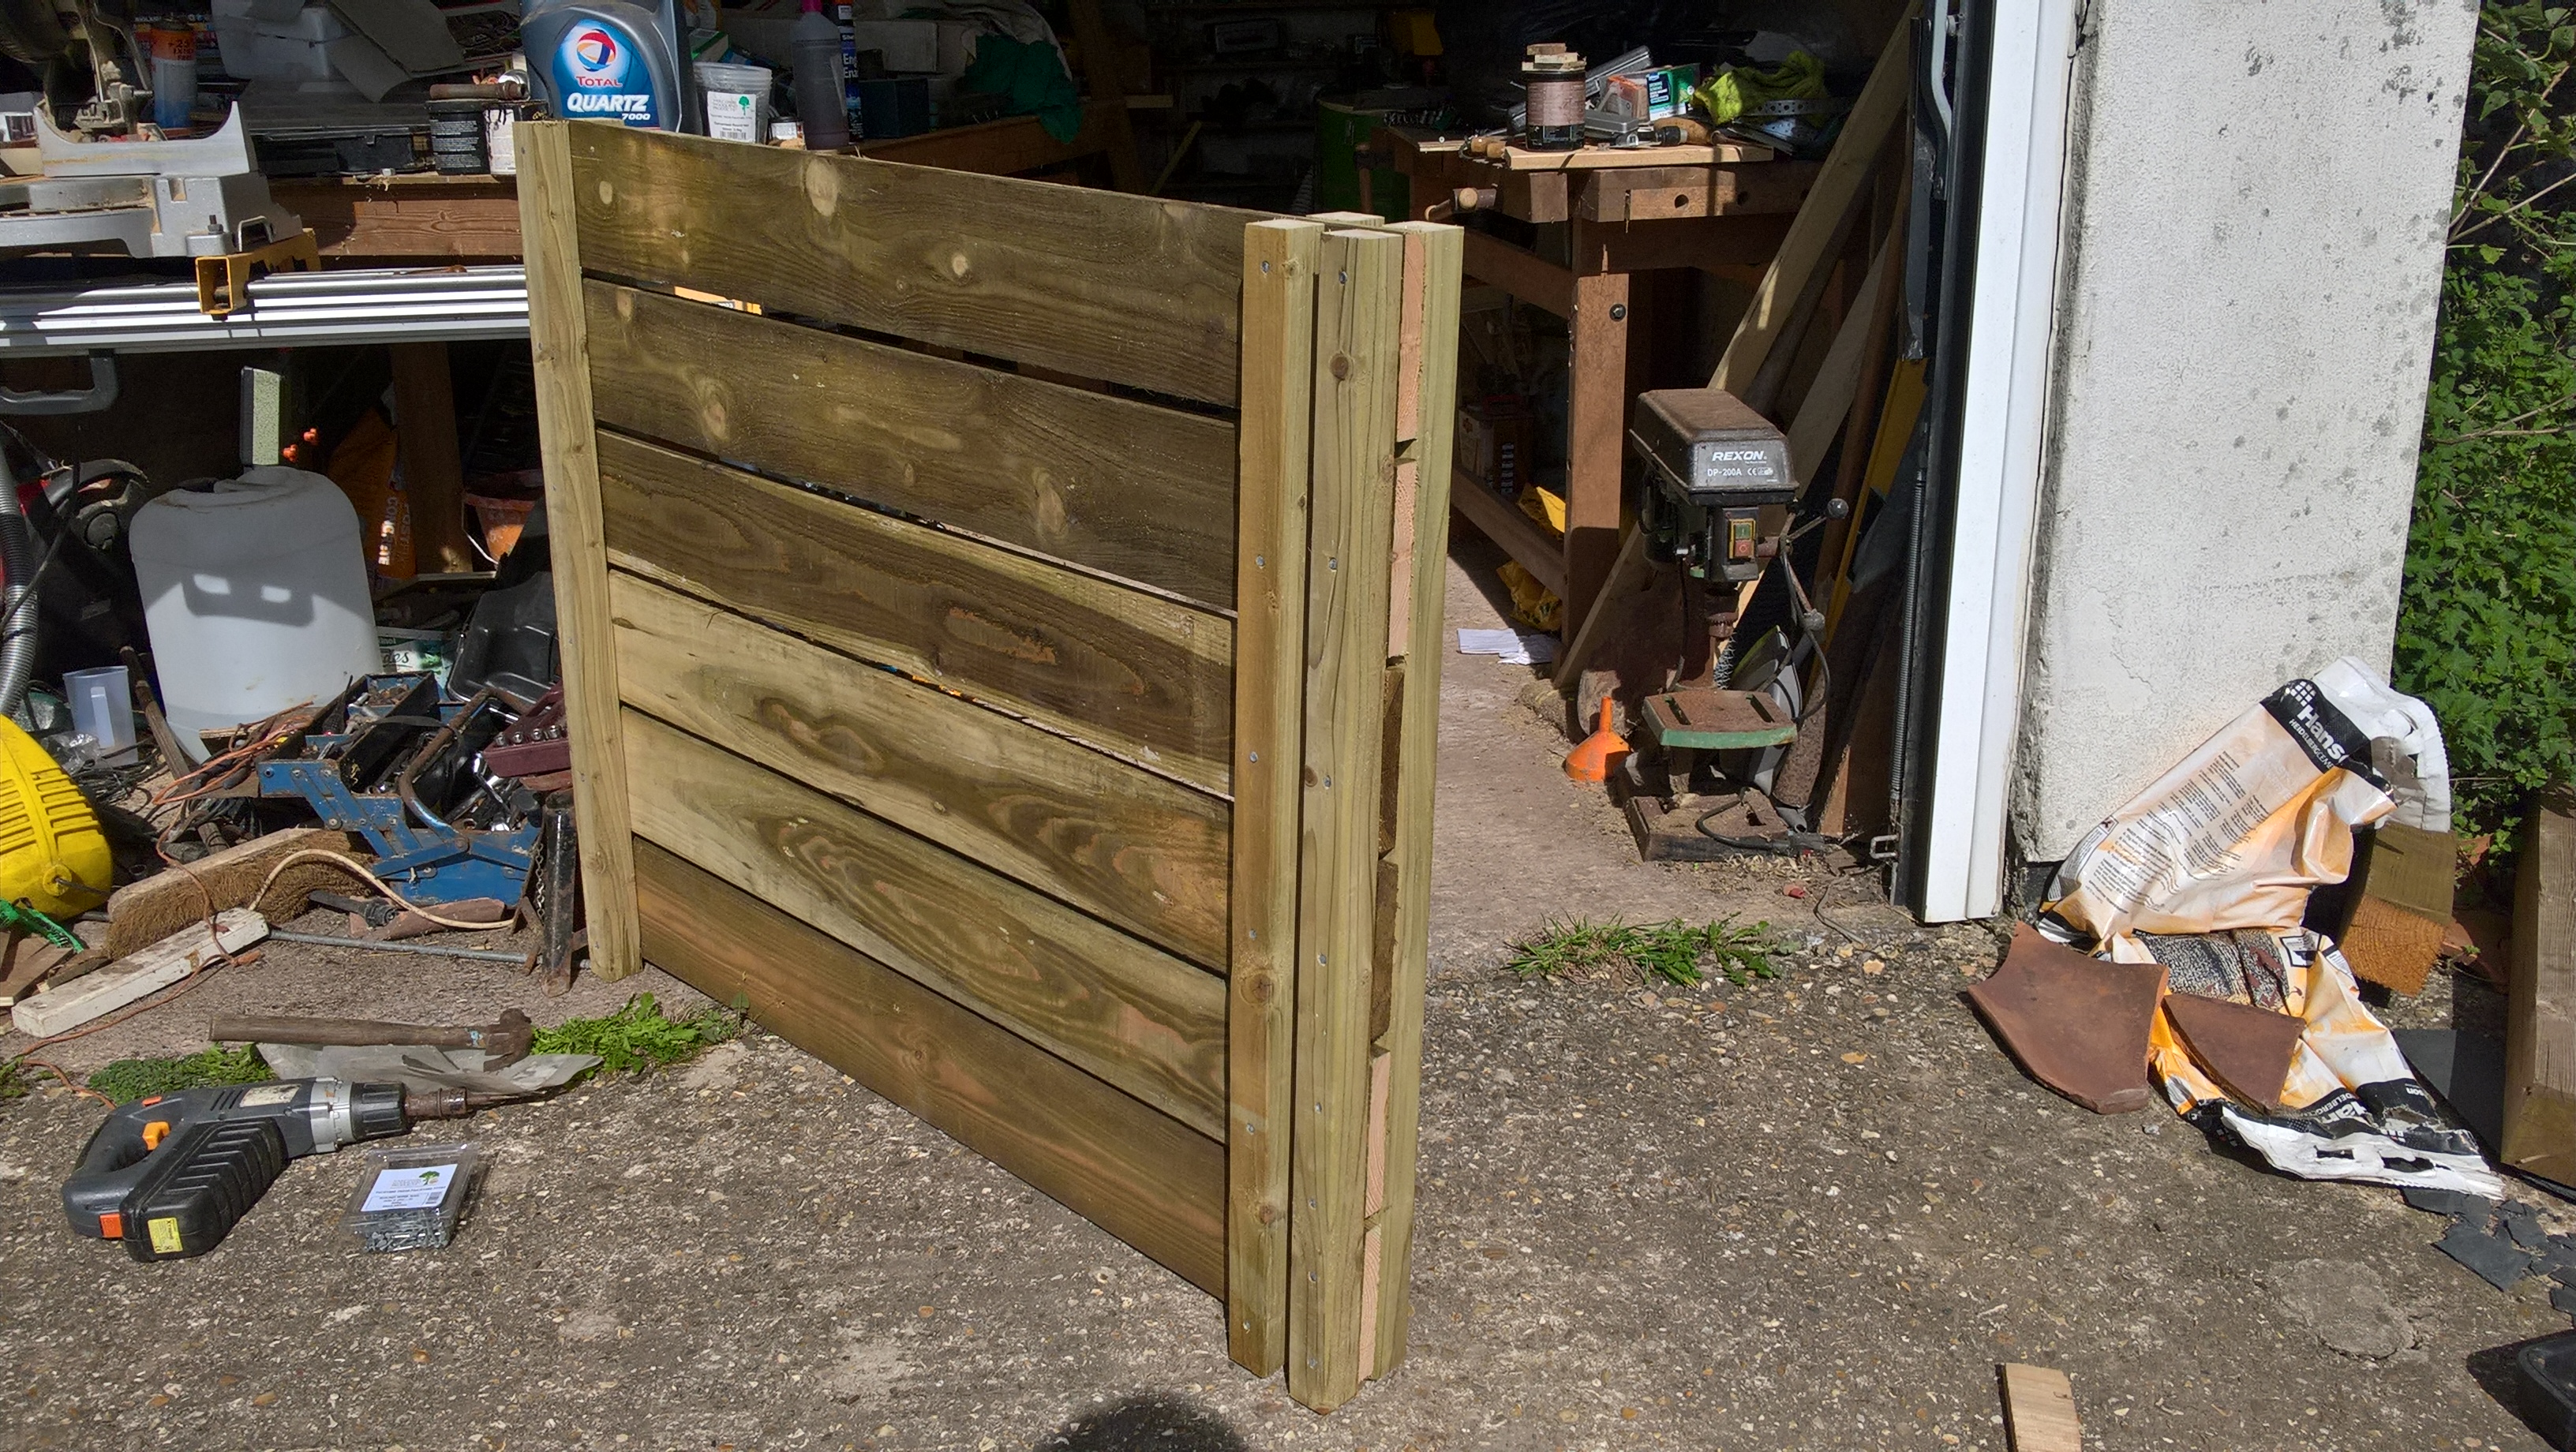
Uprights in place (here for a divider – the ends only have the uprights on one side). The 3cm slots formed at the front will hold the removable boards.
Make the two ends.
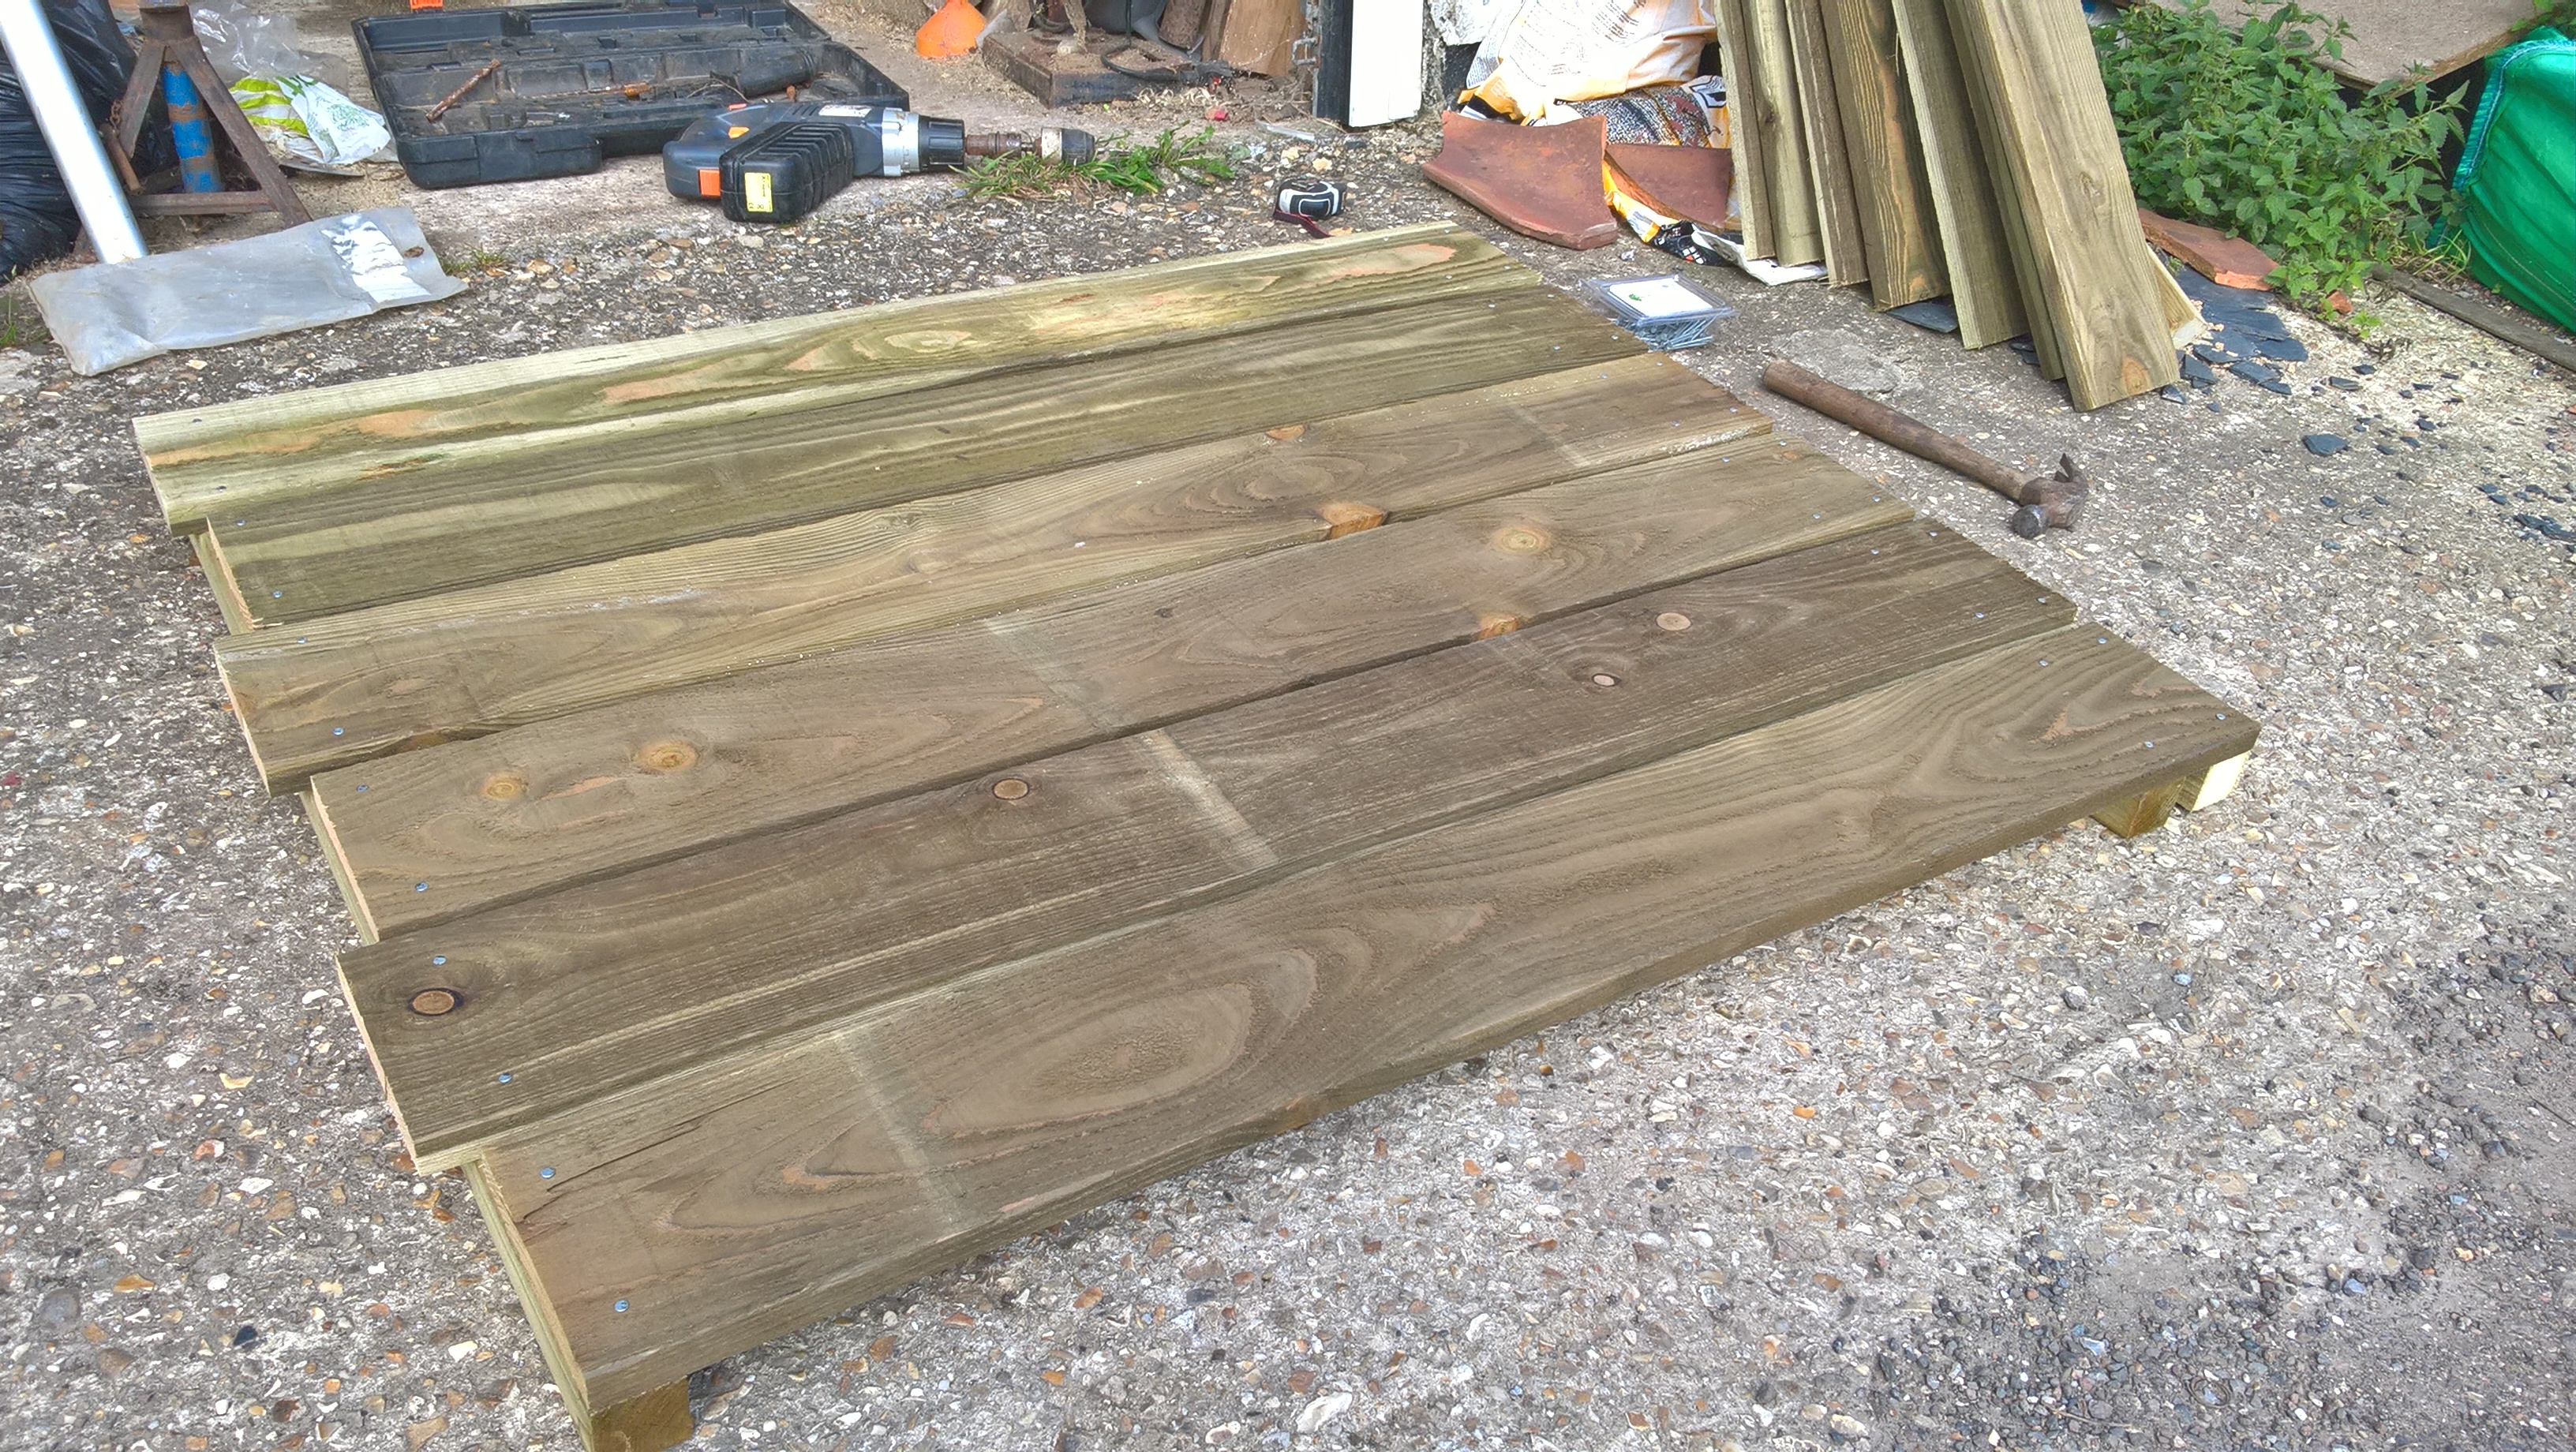
End boards nailed into place, showing the ‘staggered’ effect of using different length boards – the back will be fitted onto here
These are made in just the same way as the central dividers, with a couple of little added extras.
First – you alternate between 1.2m boards fitting snugly to the uprights, and 1.22m boards to overlap by a couple of centimetres to allow the back to fit on neatly. If you find this a bit fancy, don’t worry: just make them all the same length and adjust the back accordingly in part 2.
Second: because they’re the ends, you don’t need to put uprights on both sides, just the ‘inside’. It helps to stand them up to work out which side to put the extra uprights on: one end should have the double uprights at the front on the right-hand side of the boards (looking at them end-on), while the other end should have them on the left-hand side. Both have an inside upright at the back as well.
Now you have your kit of parts, you can install your compost bins. For which you need…

Pingback: How to make a compost bin #2 | The Constant Gardener
“3 x 2.5m boards plus 3 x 1.5m boards for the back”
Did you mean to say 6 x 2.5m boards plus 6 x 1.5m boards for the back?
Ah – I think you’re right, six of each (they go in a pattern alternating short – long then long-short so you would need one of each for each layer). I will edit accordingly – thanks for pointing this out!
Did you buy 8ft or 16ft lengths of timber and cut them to size?
How many 16ft pieces would I need to buy altogether